Creatives
What are Creatives?
Creatives are the visual and multimedia elements used to convey relevant messaging that drives interest, engagement, and actions across the customer journey. A creative includes the design, such as the look and feel of the banner, the messaging in the form of text, the products or services on offer, and a call to action. When personalized, the creative displays the most relevant layout, message, and products to each shopper.
Why use them?
You can use creatives to help deliver the right ad format with the right message based on an acquisition and retention goal, with an awareness, consideration, and conversion objective.
Who can use or make Creatives?
All users with a Commerce Max account.
When to use them?
You can use creatives to maximize audience reach and engagement across the buyer’s journey, optimize marketing spend, ensure consistent branding and messaging, and gain a complete view of customer interactions across all campaigns.
Where to find it?
To access creatives:
Click Shared Library on the top navigation menu. From the Shared Library, you can choose from:
Audiences and Segments
Creatives
Domain/ App Lists
Select Creatives to open the Creative Library

What is Creative Library?
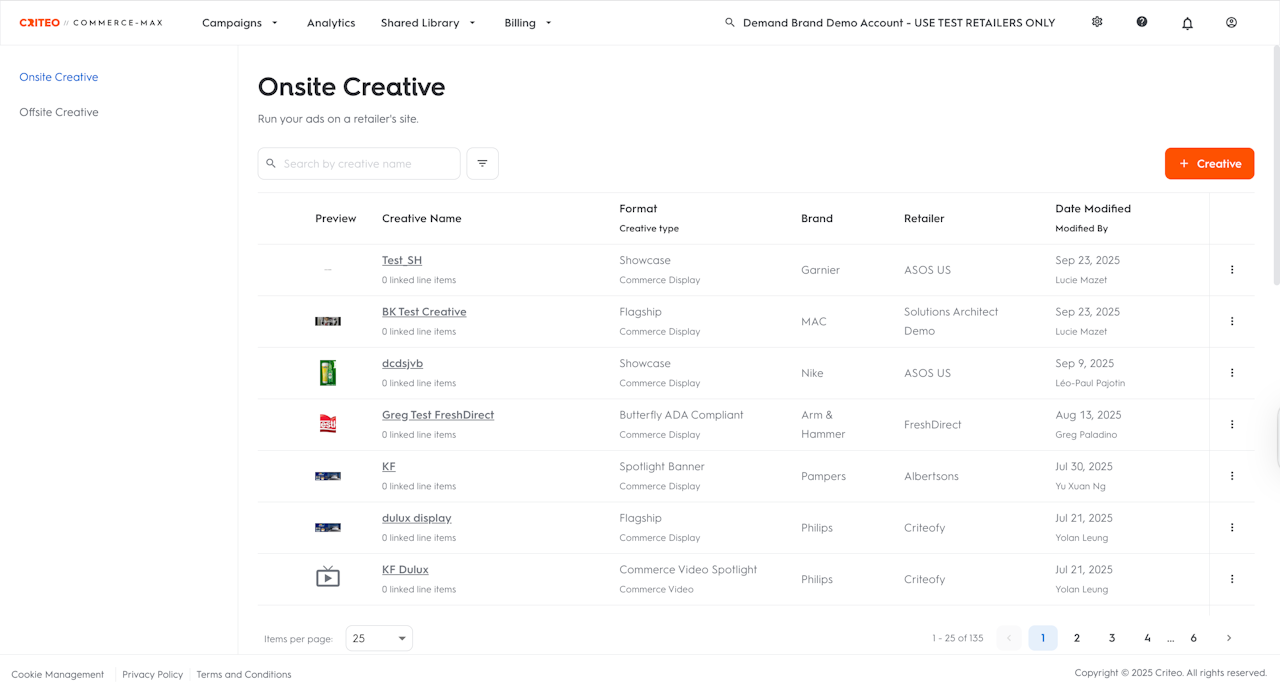
The Creative Library contains a list of all the creatives you have built. You can build a new creative or view existing ones here.
You can also search for a creative using solely the creative name in the Search Bar. Additionally, with the Filters option, you can filter creatives by Format, Media Type, Creative Type, Brand, and Retailer.
Build a Creative
This section will walk you through how you can build an Onsite creative. You can build a creative in the Creative Builder.
To open the Creative Builder:
Select Onsite creative from the left panel
Click + Creative button on the right side of the Creative Library
Build an Onsite Creative
To build a new Onsite Creative:
Click the +Creative button on the right side of the Creative Library.
On the next page, select the retailer you’d like your creative to run on.
The page will automatically populate the available page types and formats on the selected retailer.
Select the media type - Display or Video
Choose the desired Page Type from the dropdown - All Page Types, Homepage, Category, Search, Merchandising, and Product Detail.
Select your preferred Format from the dropdown - Showcase, Flagship, Butterfly, Custom, etc.
Click Continue to input the final details of the creative builder.

Creative Preview
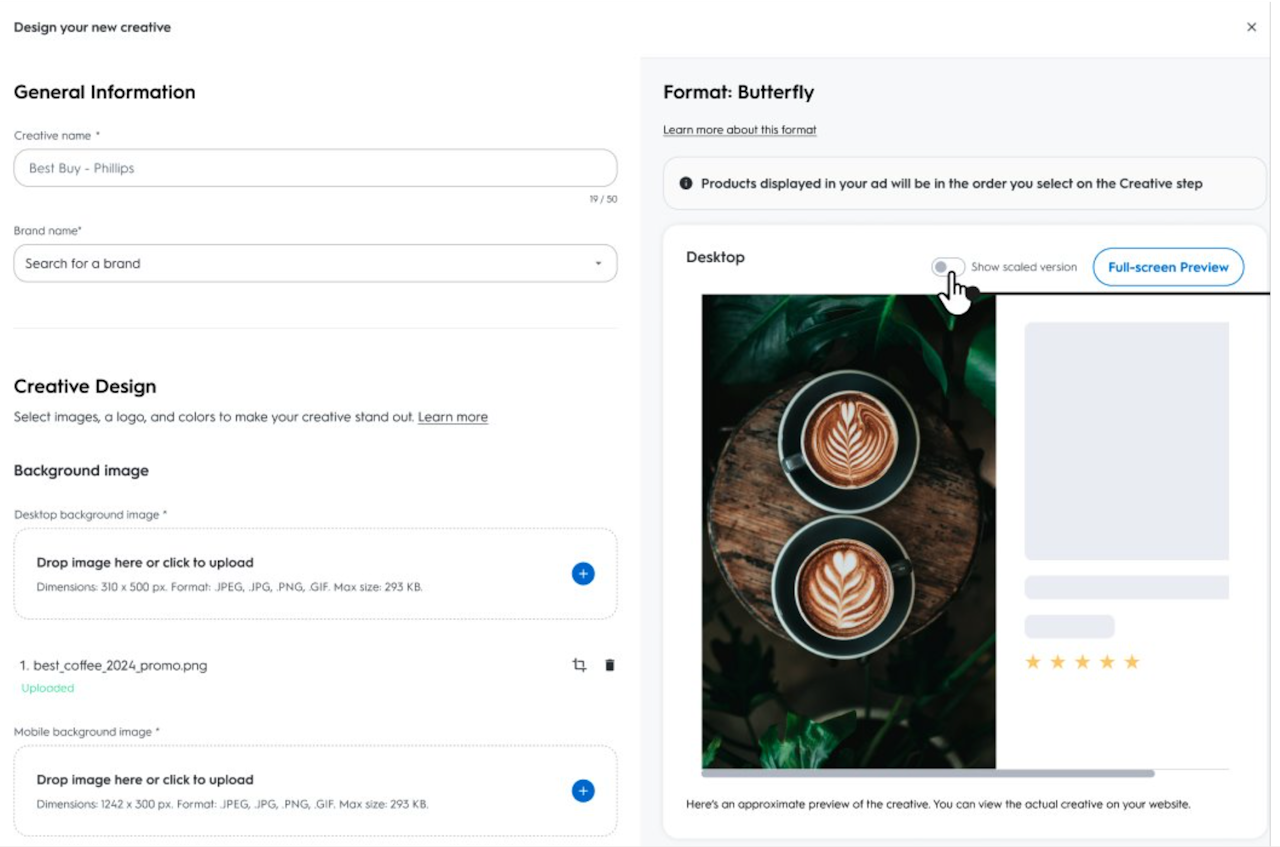
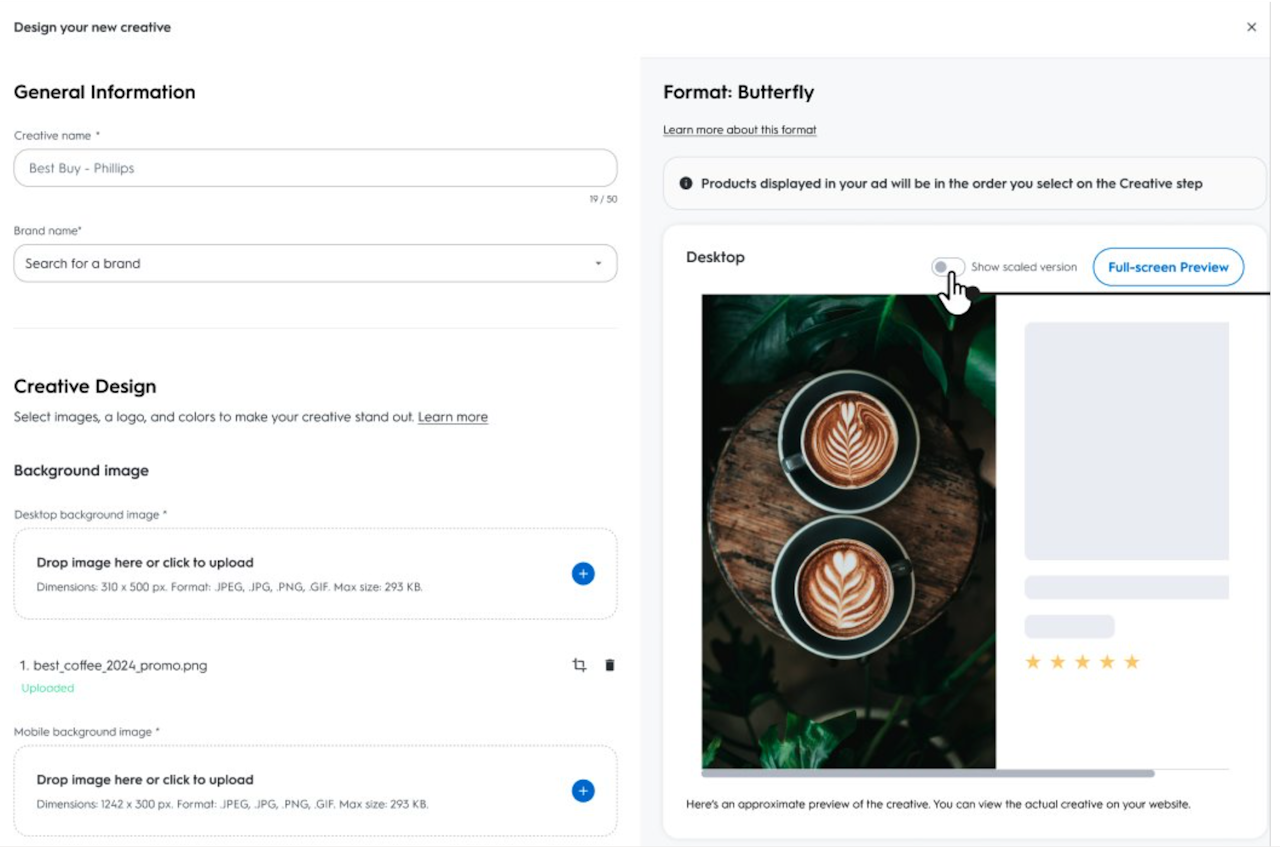
Creative Preview is a tool that allows you to see a skeleton version of your ad format before adding images and details. It updates in real-time as you upload background images and adjust settings, helping you visualize how the ad will appear.
Name & Images
In the General information section, enter the Creative name and search for the Brand name from the dropdown.
In the Design your creative section, under Desktop background image, upload the creative or image that will be used in the advertisement.
Image Cropping
If you upload an image that does not meet the format's specific dimension requirements for both standard and custom formats, the image cropping tool will appear. You will have to crop your image before being able to proceed with saving your creative.
See the table below to understand how the cropping tool works:
The image is too large or too small, but its aspect ratio matches the recommended ratio. | The image will be automatically resized to the recommended dimensions. The crop tool will be accessible, but will not open automatically. * | |
The image is too large or too small, and its aspect ratio doesn’t match the recommended ratio. | The cropping tool opens automatically, with the cropping frame area preset to reflect the correct dimensions & aspect ratio (e.g. 310 x 500 px, 31:50). While the cropping frame can be moved freely over the image and its size can be scaled up or down, the aspect ratio is fixed. Once the image is cropped, the creative preview will reload to show the image version. * | |
The image is uploaded originally with the correct dimensions. | The cropping tool will be accessible via this icon but will not open automatically. While the cropping frame can be moved freely over the image and its size can be scaled up or down, the aspect ratio is locked. In that case, once the image is made smaller after cropping, it will automatically be resized per scenario 1. * |
Adjustable Safe Zone
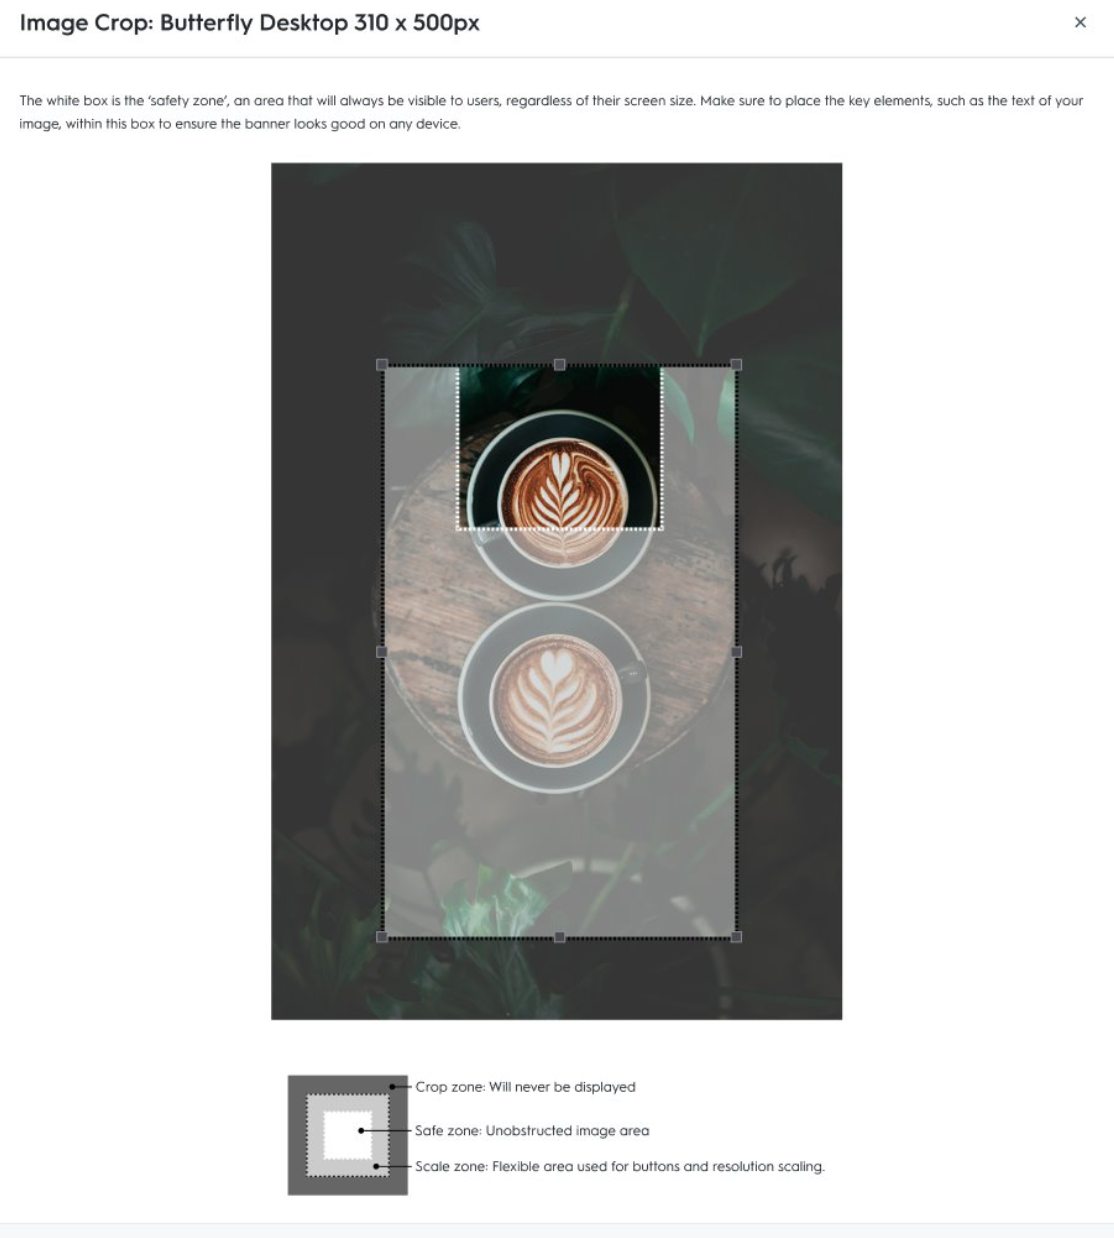
When building a creative, you'll now see a pop-up window that allows you to customize the safe zone of your image.
You can:
Drag the safe zone to reposition it. You will see a clearly marked Safe Zone, which ensures your most important content stays visible no matter how the ad scales.
Resize it by making it smaller or larger to fit your desired layout. A light transparent zone around the safe area shows where content may get partially trimmed, helping you crop smartly.
Crop the image by excluding content outside the safe zone, ensuring only the selected area is displayed. When cropping, dark overlays show the areas outside your selection, making it easier to focus on what will be shown.
This gives you more control over how your creative appears across different placements, ensuring key elements stay visible.

Alternative Text (Alt-Text)
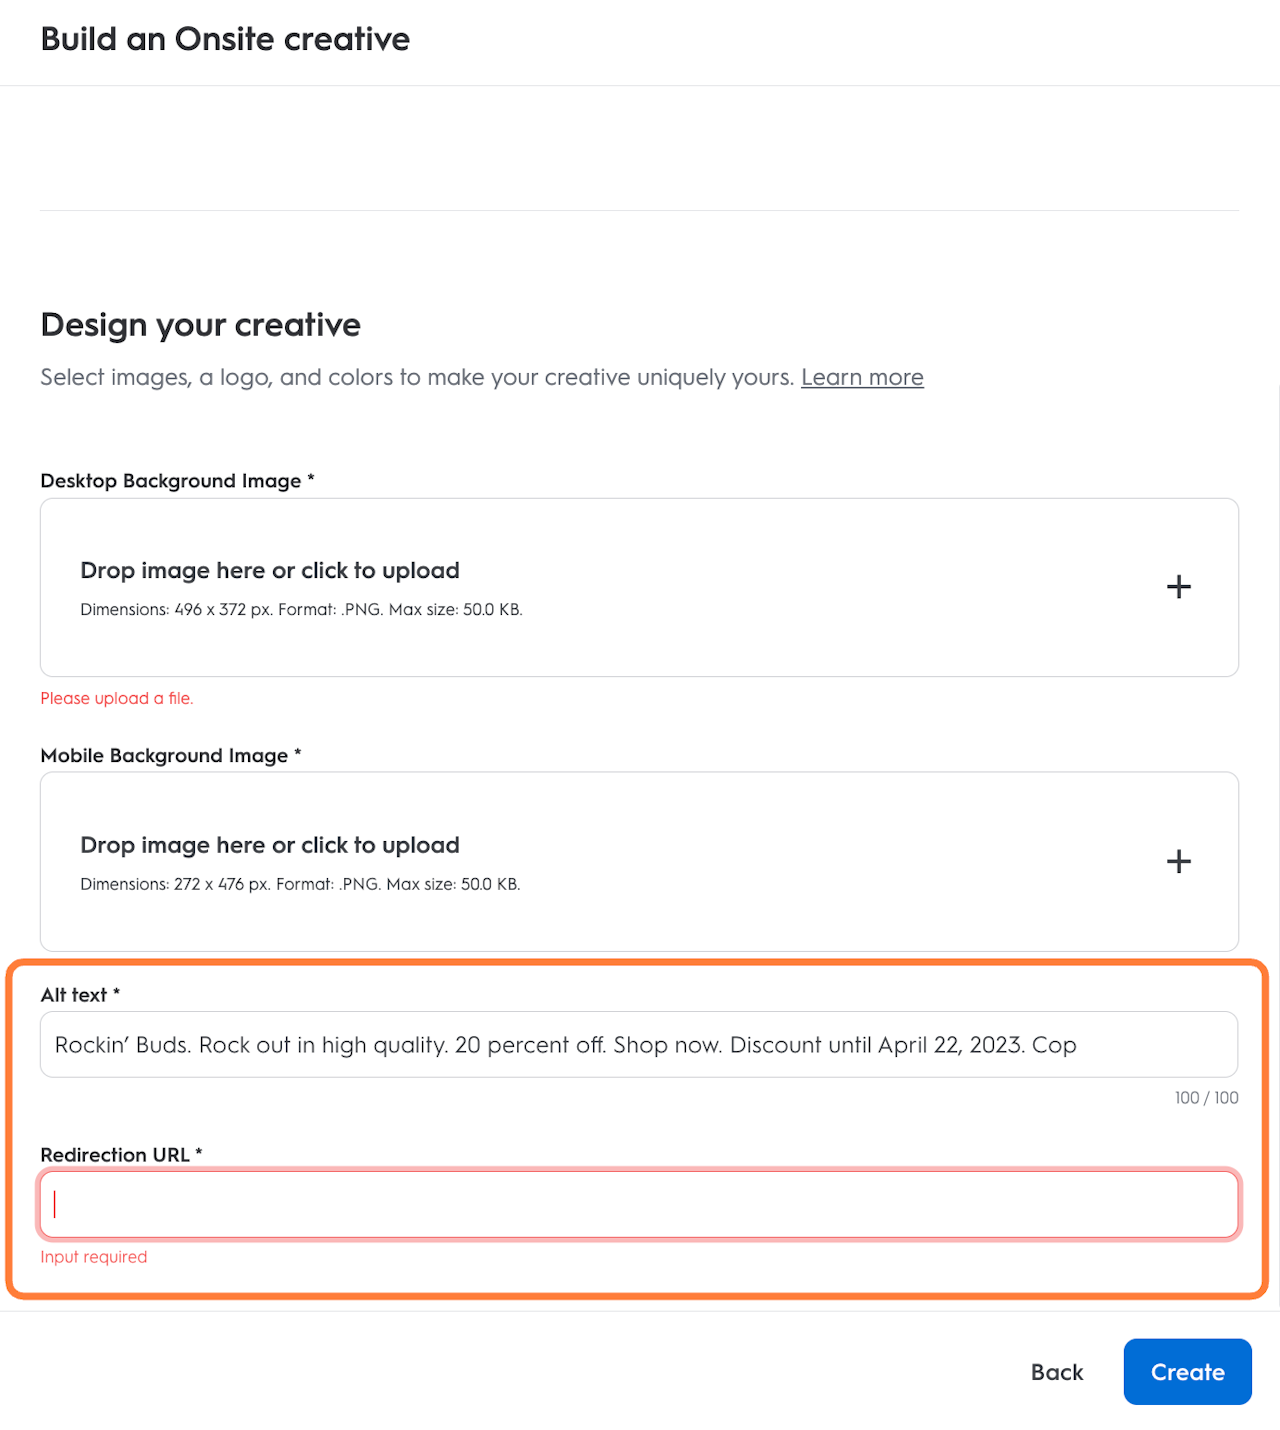
The next step is to complete the mandatory alternative text field for your image(s). Alternative text, or "alt text", describes the appearance or function of an image or advertisement on a page. It is a short text description of the content and/or the purpose of an image or advertisement on a webpage. It is:
Typically displayed on a webpage when an image fails to load.
Indexed by search engine bots to better understand the context of pages.
Read aloud by assistive technology, such as screen readers, generally used by people with visual disabilities.
When writing alt text for a creative, keep the following tips in mind:
Can be written according to this template: “[Brand name]. [Text used in the creative].”
Must be limited to 120 characters, including spaces.
Must contain the text used in the creative, including the text of the Call to Action (if the creative contains a CTA). This also includes text describing sales, discounts, legal text, and copyright text.
Must utilize proper grammar and spelling.
Doesn’t have to describe images within the creative, but may if the character limit allows.
Should be as concise as possible, containing abbreviations if necessary.
Shouldn’t contain unnecessary phrases like “image of” or “ad of.”
Doesn’t need unnecessary punctuation (dashes, commas, apostrophes), unless part of a brand name.
Should have symbols and dates spelled out: use “copyright” instead of ©, “percent” instead of %, and “May 1, 2023” instead of 5/1/23.
Redirection URL
It is the destination link that a user is sent to after clicking on an advertisement. The URL ensures the user reaches your intended page (e.g., product page, signup form etc).

Preview
Prior to uploading background images, you’ll be able to see a skeleton version of the selected format on the right side of the screen in the Creative Preview tool.
The skeleton image provides a framework of the elements comprising the ad to give you a visual sense of how it will appear, even before you add any details or images.
The preview tool updates in real-time, so when you upload background images, you’ll see the preview reload to display your images. Use the preview tool to adjust your images and ad settings as needed before adding them to your line item. You can also add a background color and border color in this section by entering hex codes or using the pop-up color selection tool.
For more information, please reference the Creative Demo article.
Add-ons
After filling out the mandatory fields, you can add optional fields as well to your ad, like a Call-to-Action (CTA) link, CTA file, or legal text that may be required for your product.
The number of available add-ons varies by format type. Some formats allow one, and others allow more than one.
Use the toggle to expose the available options for the add-on:
CTA link: An interactive button that links to an onsite URL, like a product page.
CTA file: An interactive button that opens a file, like a downloadable coupon.
Legal text: Used for legally required copy, such as copyright and trademark information.
The fields for each add-on option vary, but you’ll be able to view the changes you make in the preview on the right. You can input things redirection links, text, and colors, for the add-on elements.
Once the creative images and settings have been entered and uploaded, click Create to finish building the creative. You will be brought back to the Creative Library, where you can view your creative or edit it.
Related Articles:

