
Create an Onsite Display Line Item
To create a line item, remember that you need to create a campaign first.
At the end of your campaign creation, you will be automatically redirected to the line item creation workflow.
If you have already created a campaign and want to create additional line items, follow the steps below:
Click Campaigns in the header of the Criteo Retail Media Platform to access the Campaigns page.
Click on the name of the campaign to which you want to add a line item.
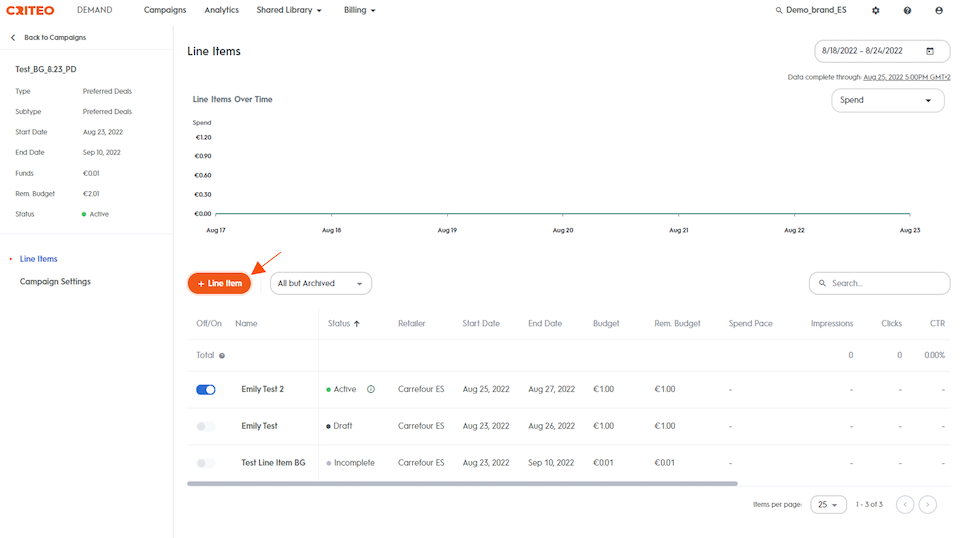
You are now on the Line Item Dashboard. Here you can see all line items that exist under this campaign, and you can add new ones.
Click the +Line Item button.

Name & Retailer
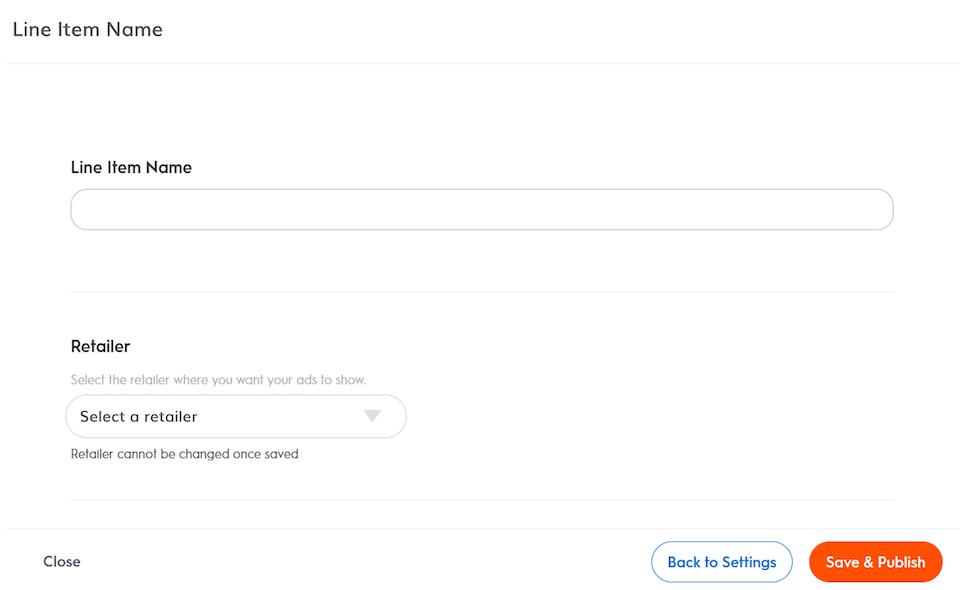
Name
The first step in line item creation is to name your line item.
The line item name you choose will only be shown in the platform on the Line Item and Analytics pages. It won't appear in your ads and will never be visible to shoppers.
Enter a name that will help you identify it within your campaign or reporting. A good example is something like “Date_Brand_Category_Retailer.” A line item name is unique and each line item under a campaign must have a different name.
Retailer
After naming the line item, choose the Retailer you want your ads to run on.
Click the dropdown to select from the available retailers. You can select one retailer only per line item.
Your retailer selection determines the products, the page types, and the ad formats available.

Start & End Dates
After naming the line item and selecting the retailer, enter the start and end dates. Both are mandatory.
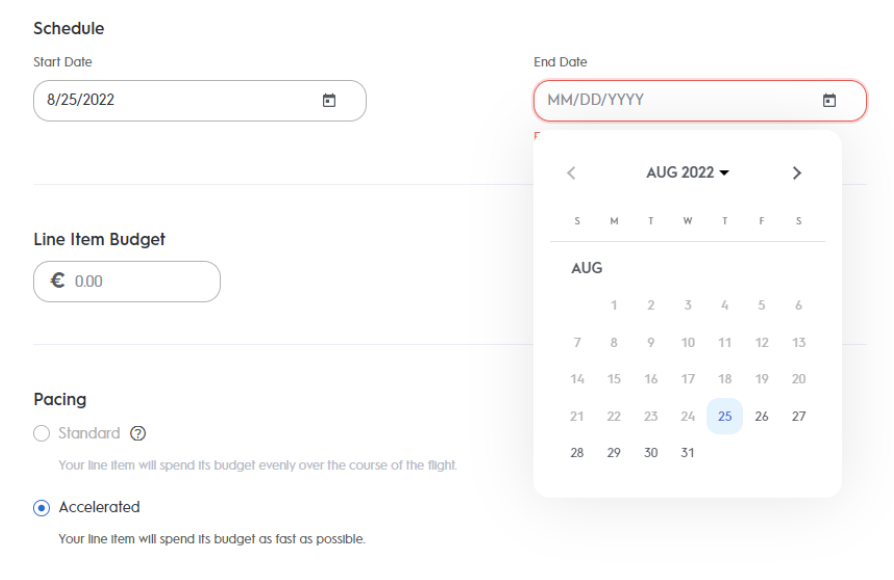
Start by selecting the start date on the calendar. Today's date is selected by default, but you can select any date in the future.
Then continue by selecting an end date directly on the calendar. Your line item will stop serving ads and change to Ended status on this precise date at the end of the day.

Budget & Pacing
Budget
Enter the maximum amount for your line item to spend for the duration of your campaign. Setting a budget does not guarantee that your line item will spend the entire amount. The amount is used as an objective and your line item will stop delivering when it is reached.
Pacing
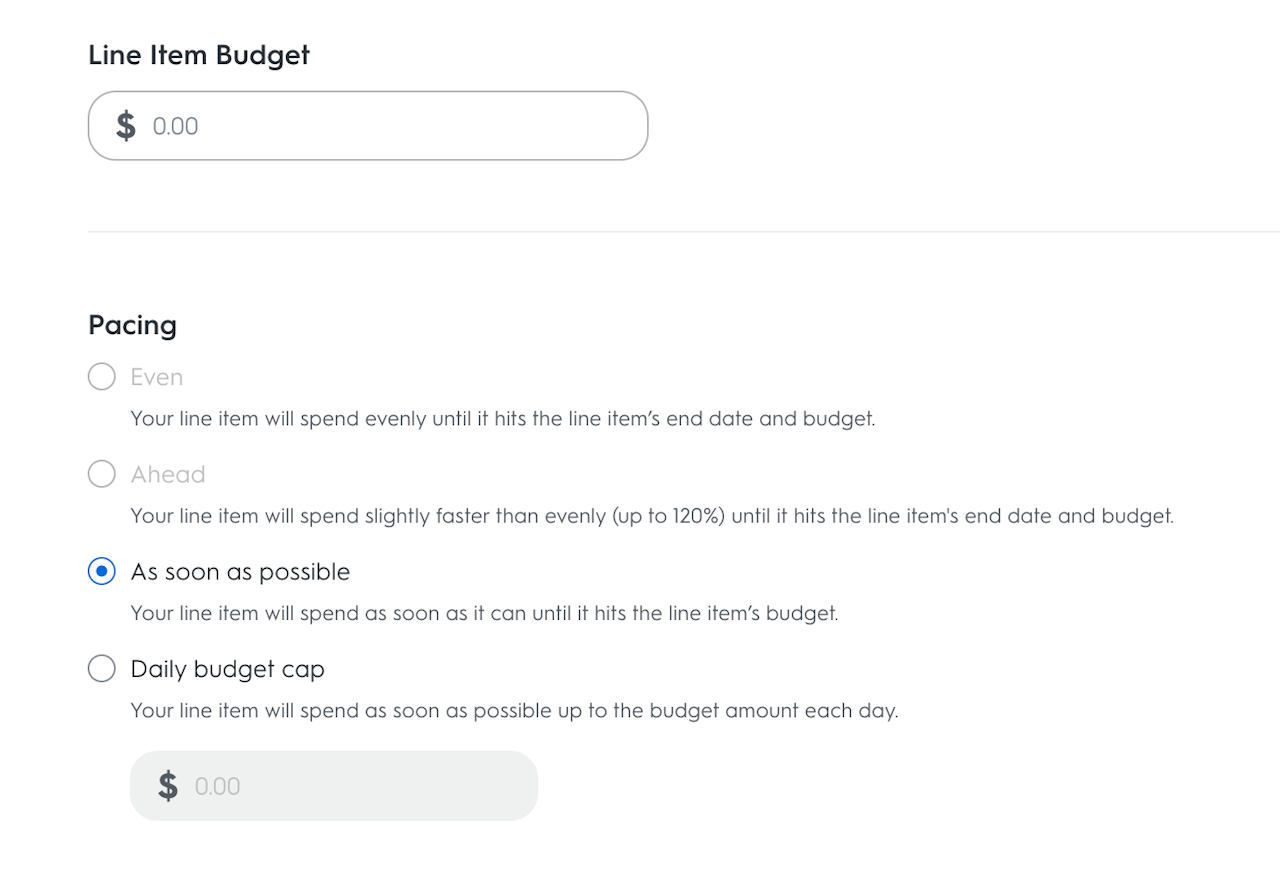
After selecting your campaign budget, you can choose how that budget is spent over time. Pacing helps you control whether your budget is used all at once or spread out across days.
You have four pacing options:
ASAP - Spend as Fast as Possible
Starts spending immediately from the campaign start date.
Continues until the budget is used up or the campaign ends.
Best for urgent exposure or quick impact.
No pacing control – may exhaust the budget early.
Daily Cap - Set a Daily Spending Limit
You choose a max amount to spend per day.
The cap resets every midnight.
Helps prevent overspending on any one day.
Manual adjustments may be needed if pacing needs change mid-campaign.
Even - Spread Spend Evenly Over Time
Distributes the total budget equally across all campaign days.
Uses smart hourly traffic data to match spend with shopper activity.
Each hour can spend up to 120% of its normal share to avoid under-delivery.
It is recommended for campaigns running 3+ days.
How it works:
Daily Budget = Total Budget ÷ Number of Days
Hourly Weights: Higher spend allowed during peak hours.
120% Flex Rule: Each hour can exceed its expected spend by up to 20%, but your total daily and campaign budget won’t go over.
Ahead - Spend More Early
Uses the same hourly weights and 120% flex rule as Even.
Spends more budget early in the campaign and less later.
Helpful for product launches or when early visibility is key.
Great for short flights or launch moments.
How it works:
Front-Loaded Curve: Starts with a higher daily budget (e.g., 10% on Day 1, 9% on Day 2).
Allows for recovery later if early days don’t fully spend.

Frequency Cap (Optional)
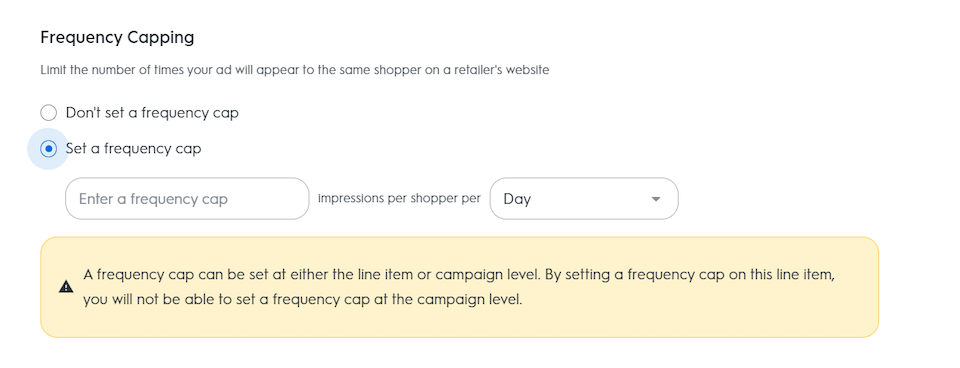
At the end of step 1 of your line item creation, you can set up a Frequency Cap to limit the number of impressions shown to a unique shopper.
The Frequency Cap can be set at either the line item OR at the campaign level, but it cannot be set on both the line item and campaign level.
To set a Frequency Cap: enter the maximum number of impressions (valid entries: 1-20) and choose between two event types: Day, Session.
