

Step 1: Create an Offsite Line Item
Each campaign consists of one or several line items. You can run an ad only after creating a campaign and at least one line item.
A line item is where you will select the products and the retailer you'd like to advertise with. There are also a number of settings such as creatives and advanced targeting that are defined at the line item level.
At the end of your campaign creation, you will be automatically redirected to create the first line item of that campaign.
If you have already created a campaign with one or more line items and want to create additional line items, follow the steps below:
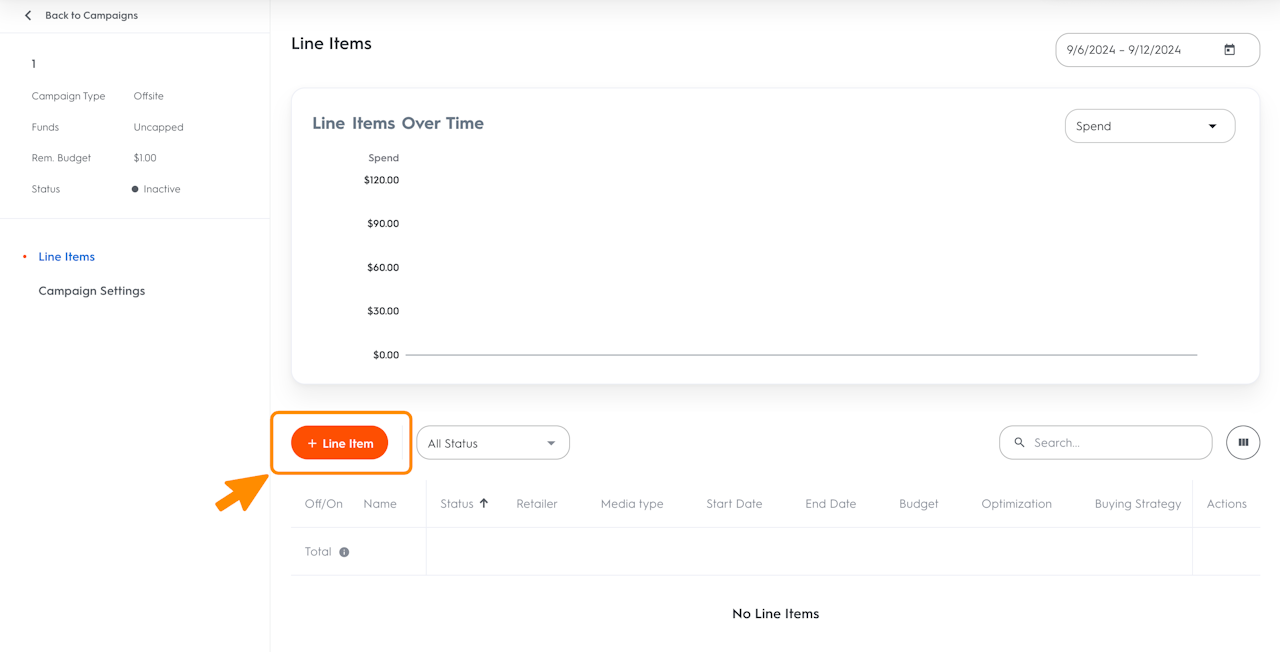
Click Campaigns in the header of Commerce Max to access the Campaign Dashboard.
Click the name of the campaign to which you want to add a line item.
On the Line Items page, you can see all line items and add new ones.
Click +Line Item to create a new line item.
Select your Campaign Type
Select Offsite.

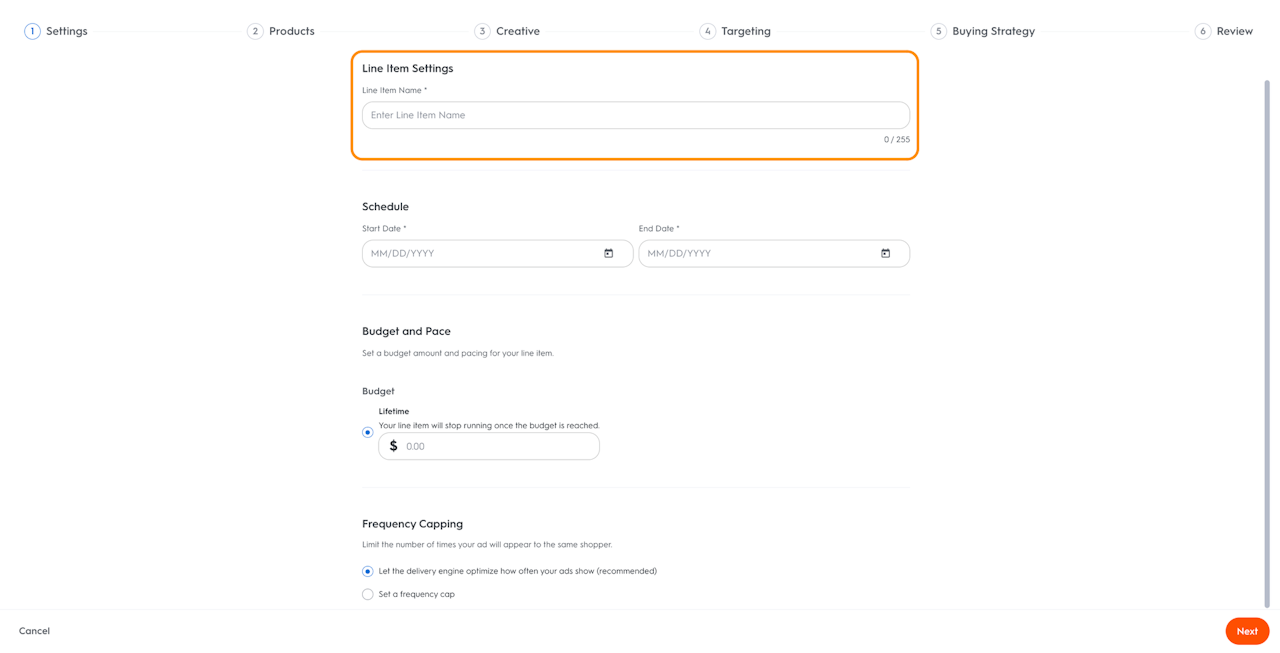
Settings
Naming your Line Item
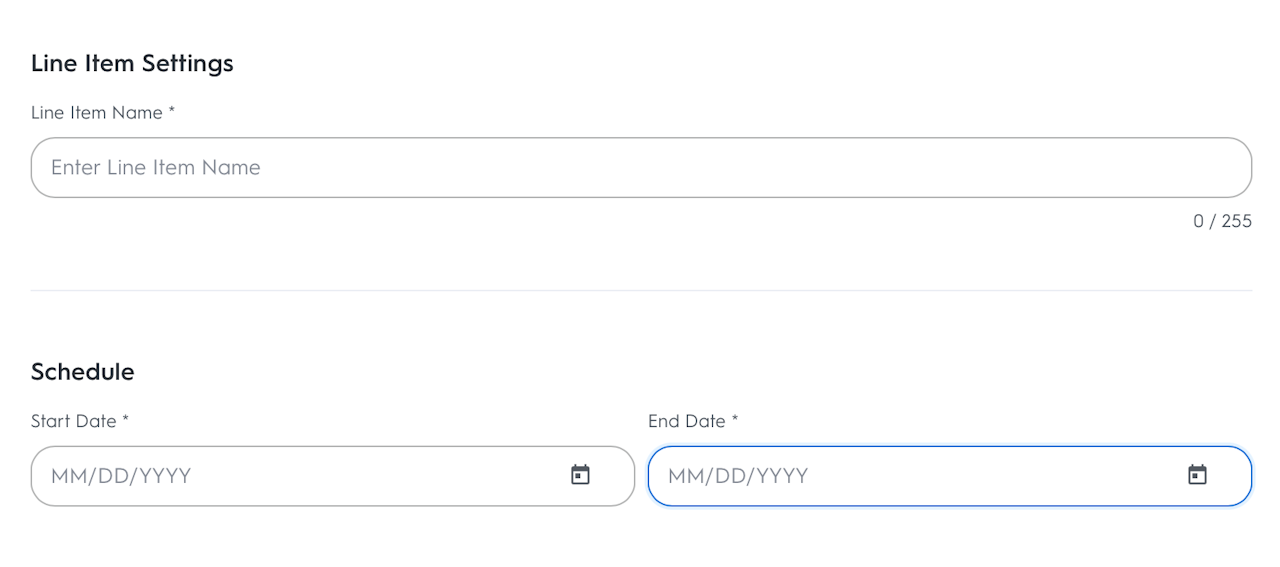
The first step in line item creation is to name your line item.
The line item name you choose will be seen only by you on the Line Items page and Analytics page. It won't appear in your ads and will never be visible to shoppers.
We recommend that you choose a name that will be easy to identify within the Line Item Dashboard or in reporting, such as “Month_Brand_Category_Retailer”. A line item name is unique and each line item must be named differently within the same campaign. You may however edit your line item's name at any point.

Schedule
Setting Start and End Dates
After naming the line item, enter the start and end dates. Both are mandatory.
Begin by selecting the start date on the calendar. Today's date is selected by default, but you can select any date in the future. You will not able to select a date in the past.
Then continue by selecting an end date directly on the calendar. Your line item will stop serving ads and change to ended status on this precise time and date.

Budget and Pace
Setting a Line Item Budget
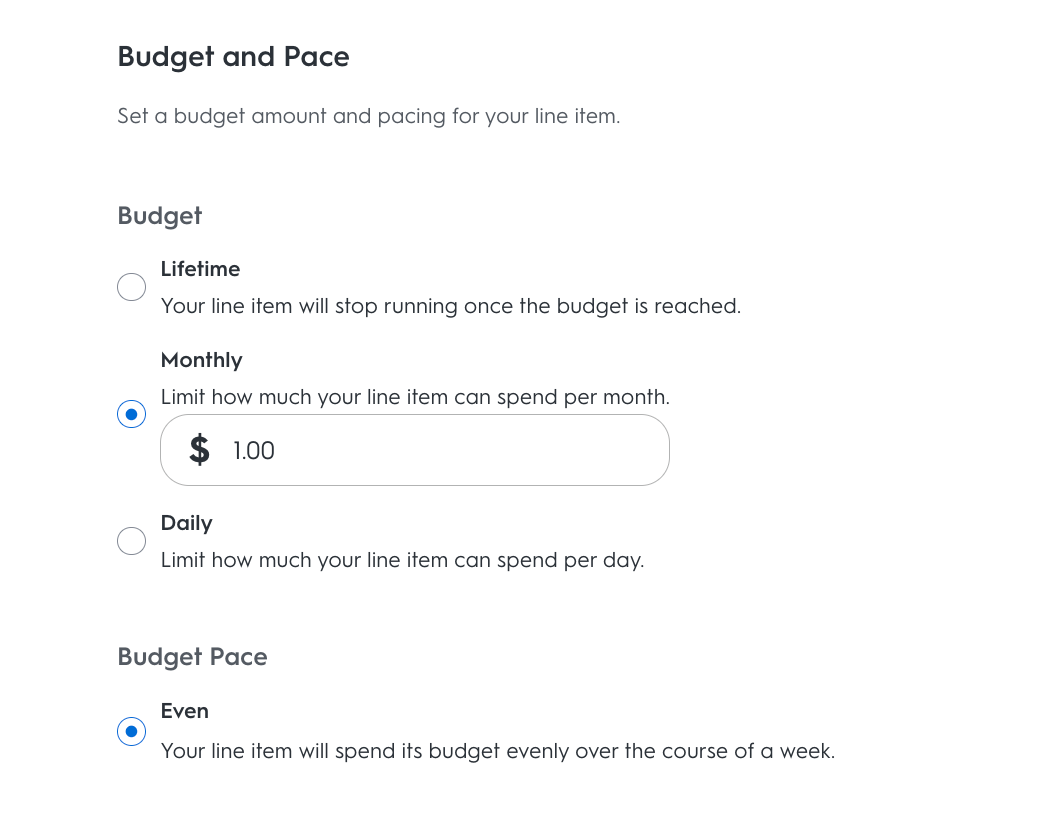
Enter the maximum amount for your line item to spend. Your line item might not spend the entire amount. You can set budgets for the following durations:
Lifetime: Amount for your line item to spend for the duration of the campaign
Monthly: Amount your line item can spend per month
Daily: Amount your line item can spend per day
The amount is used as an objective and your line item will stop delivering when it is reached. If the line items' accumulated budget is bigger than the campaign budget, the line items will stop spending when it reaches the campaign budget limit.
Setting Budget Pace
After the budget selection, you can set up pacing options to help you control the pace at which your budget will spend.

Frequency Cap (Optional)
At the end of step 1 of your line item creation, you can set up a Frequency Cap to limit the number of impressions shown to a unique shopper.
The Frequency Cap can be set at either the line item or at the campaign level, but the campaign level will take precedence over all of the line items. Once the campaign level frequency cap is hit, all line items under that campaign will stop serving ads to that shopper.
To set a Frequency Cap, enter the maximum number of impressions to serve to each unique shopper and specify the amount of time using hours, days, or lifetime.
