
How to Associate an Audience to a Line Item?
This guide will walk you through how to associate an audience with a line item. After creating an audience, you can associate it with a Line Item on the Targeting step when setting up a line item. Follow these steps:
On the Campaigns page, click the campaign name to access the line items page.
Click +Line Item to start creating a new line item or click the three dots under the Actions column of an existing line item.
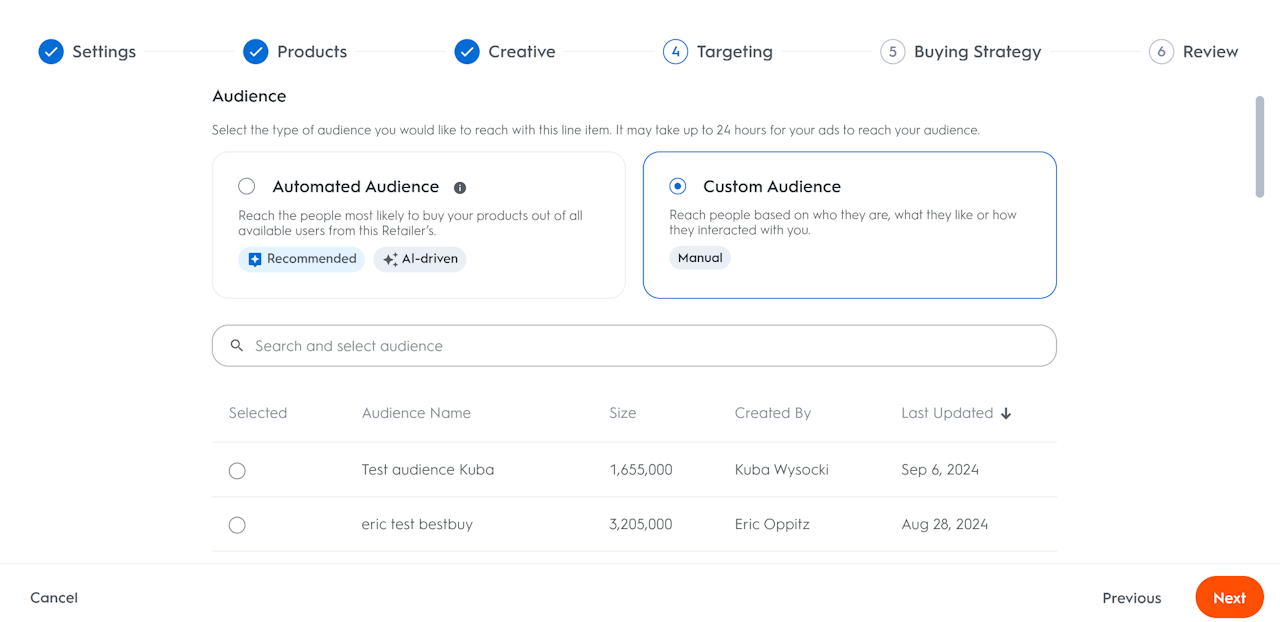
In the Targeting step of setting up/ editing a line item, you’ll have the option to select the type of audience you would like to reach. Your options will be an Automated audience or a Custom audience.
To associate an Automated audience, simply select the Automated Audience box, define your targeting and choose Next. The audience will automatically be created and associated with the line item. To learn more, please see Automated Audiences.
To associate with a Custom audience, select the Custom Audience box and choose from your created audience.
Search for and select one audience.
By default, the search returns the first 25 audience segments that match the search query. To see more results, either increase the number of items per page or navigate to the next page.
Using the drop-down list, you can easily filter between Audiences built with the Audience Builder and the Customer Lists shared by retailers.
For more information on associating an audience with a line item, you can refer to Step 4: Select Audience of creating an Offsite line item.
